100% satisfaction guarantee Immediately available after payment Both online and in PDF No strings attached
logo-home
Marketing Environments: Week 2 Lecture $7.99
Add to cart

Class notes

Marketing Environments: Week 2 Lecture

 4 views  0 purchase

These notes cover the week 2 lecture on Marketing Environments. The lecture notes include 1 page of notes for the following topics: Lecture 2.1: Grouping and Layering Lecture 2.2: Grouping and Layering Lecture 2.3: Drawing and Editing Lines and Shapes Lecture 2.4: Drawing and Editing Lines an...

[Show more]

Preview 1 out of 3  pages

  • September 24, 2024
  • 3
  • 2024/2025
  • Class notes
  • Dapzury valenzuela
  • All classes
All documents for this subject (2)
avatar-seller
nicholelosh
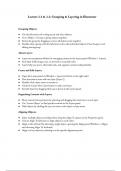
Lecture 2.1 & 2.2: Grouping & Layering in Illustrator


Grouping Objects:

● Use the Selection tool to drag across and select objects.
● Go to Object > Group to group objects together.
● Resize the group by dragging a corner; all objects resize together.
● Double-click a group with the Selection tool to edit individual objects. Press Escape to exit
editing and regroup.

About Layers:

● Layers are transparent folders for managing content in the Layers panel (Window > Layers).
● Each layer holds images, text, or artwork in a stacked order.
● Layers help you move, edit, hide, lock, and organize content independently.

Create and Edit Layers:

● Open the Layers panel via Window > Layers (or find it on the right side).
● New documents start with one layer (Layer 1).
● Double-click a layer name to rename it.
● Click the Create New Layer button to add a new layer.
● Reorder layers by dragging them up or down in the Layers panel.

Organizing Content with Layers:

● Move content between layers by selecting and dragging the color box to a new layer.
● Use "Locate Object" to find specific artwork in the Layers panel.
● Hide objects by clicking the eye icon next to the object or layer name.

Aligning Objects:

● Select multiple objects and align them using the Align To option in the Properties panel.
● Choose Align To Selection to align objects to each other.
● Align to the artboard by selecting a single object, opening the Align panel (Window > Align),
and choosing Align To Artboard.
● Align to a key object by selecting it as the specific alignment point.

The benefits of buying summaries with Stuvia:

Guaranteed quality through customer reviews

Guaranteed quality through customer reviews

Stuvia customers have reviewed more than 700,000 summaries. This how you know that you are buying the best documents.

Quick and easy check-out

Quick and easy check-out

You can quickly pay through credit card or Stuvia-credit for the summaries. There is no membership needed.

Focus on what matters

Focus on what matters

Your fellow students write the study notes themselves, which is why the documents are always reliable and up-to-date. This ensures you quickly get to the core!

Frequently asked questions

What do I get when I buy this document?

You get a PDF, available immediately after your purchase. The purchased document is accessible anytime, anywhere and indefinitely through your profile.

Satisfaction guarantee: how does it work?

Our satisfaction guarantee ensures that you always find a study document that suits you well. You fill out a form, and our customer service team takes care of the rest.

Who am I buying these notes from?

Stuvia is a marketplace, so you are not buying this document from us, but from seller nicholelosh. Stuvia facilitates payment to the seller.

Will I be stuck with a subscription?

No, you only buy these notes for $7.99. You're not tied to anything after your purchase.

Can Stuvia be trusted?

4.6 stars on Google & Trustpilot (+1000 reviews)

49051 documents were sold in the last 30 days

Founded in 2010, the go-to place to buy study notes for 15 years now

Start selling
$7.99
  • (0)
Add to cart
Added