100% satisfaction guarantee Immediately available after payment Both online and in PDF No strings attached
logo-home
WGU D336 Business of IT – Applications LATEST 2024 FINAL ASSESSMENT EXAM (ITIL Foundation) GRADED A+ COMPLETE 200 QUESTIONS FULLY SOLVED $17.99   Add to cart

Exam (elaborations)

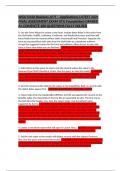
WGU D336 Business of IT – Applications LATEST 2024 FINAL ASSESSMENT EXAM (ITIL Foundation) GRADED A+ COMPLETE 200 QUESTIONS FULLY SOLVED

 0 view  0 purchase
  • Course
  • Institution
  • Book

WGU D336 Business of IT – Applications LATEST 2024 FINAL ASSESSMENT EXAM (ITIL Foundation) GRADED A+ COMPLETE 200 QUESTIONS FULLY SOLVED

Preview 2 out of 9  pages

  • November 15, 2024
  • 9
  • 2024/2025
  • Exam (elaborations)
  • Questions & answers
avatar-seller
WGU D336 Business of IT – Applications LATEST 2024
FINAL ASSESSMENT EXAM (ITIL Foundation) GRADED
A+ COMPLETE 200 QUESTIONS FULLY SOLVED
0. Use the Form Wizard to create a new form. Include these fields in this order from
the Staff table: StaffID, LastName, FirstName, and MedicalInsurance and then add
these fields from the InsurancePlans table: InsuranceID and Premium. Organize the
form by InsurancePlans with data from the Staff table as a datasheet subform.
Accept the suggested names for the form and subform. Allow Access to open the
form in Form view when you are finished. - ANSWER: On the Create tab, in the Forms
group, click the Form Wizard button. Expand the Tables/Queries list and select Table:
Staff. Double-click these fields in order: StaffID, LastName, FirstName, and
MedicalInsurance. Expand the Tables/Queries list again and select Table:
InsurancePlans. Double-click InsuranceID and Premium. Click Next. Click by
InsurancePlans. Click Next. Click Finish.

1. Add criteria to this query to return only the records where the value in the
InsuranceType field is Dental or Vision. Run the query to view the results. - ANSWER:
Type Dental in the Criteria row in the InsuranceType column. Type Vision in the or
row in the InsuranceType column (below the Criteria row). On the Query Tools
Design tab, in the Results group, click the Run button.

2. Sort the records in this table by the values in the DateOfHire field, so records with
the oldest dates appear first. - ANSWER: DATEOFHIRE-->Downtab-->oldest

3. Import data from the UpdatedBenefitPlans text file and append the records to the
Benefits table. The data fields in the text file are separated by tabs. The first row in
the text file is the header row. Save the import steps. Use the default name
suggested by Access. - ANSWER: On the External Data tab, in the Import & Link
group, click the New Data Source button, select From File, and click Text File. Click
the Browse... button. Click UpdatedBenefitPlans, and then click Open. Click the
Append a copy of the records to the table: radio button, and verify that Benefits is
selected. Click OK. Click Next. Click the First Row Contains Field Names check box.
Click Next. Click Finish. Click the Save Import Steps check box. Click the Save Import
button.

4. Create a new blank report that will open in Layout view. - ANSWER: In the Create
Ribbon Tab in the Reports Ribbon Group, you clicked the Blank Report button.

5. Set the sort order so the results will display records with the highest Premium
first. Run the query and review the results. - ANSWER: Click in the Sort row under the
Premium field. Click the arrow to expand the sort options list, and select Descending.
On the Query Tools Design tab, in the Results group, click the Run button.

, 6. Change the Navigation Pane grouping option to Tables and Related Views. -
ANSWER: You clicked the Navigation Pane Header. In the Category/Group menu, you
clicked the Tables and Related Views menu item.

7. Create a new relationship between the StaffID field in the Staff table and the
Reviewer field in the Reviews table. Enforce data integrity between the two tables. -
ANSWER: On the Database Tools tab, in the Relationships group, click the
Relationships button. Click StaffID in the Staff table and drag to Reviewer in the
Reviews table. In the Edit Relationships dialog, click the Enforce Referential Integrity
check box. Click Create

8. Add criteria to this query to return only the records where the value in the
Premium field is greater than 200 and less than 250. Run the query to view the
results. - ANSWER: Type >200 and <250 in the Criteria row in the Premium column.
On the Query Tools Design tab, in the Results group, click the Run button

9. Use the Report Wizard to create a new report. Include fields in this order:
DepartmentName from the Departments table, LastName, FirstName, and
DateOfHire from the Staff table. View the report data by the Departments table. Add
grouping by DateOfHire. Sort records by DateOfHire. Use the Stepped layout and
Portrait orientation. Name the report StaffByDepartment and allow Access to display
the report in Print Preview view when you finish. - ANSWER: Expand the
Tables/Queries list and select Table: Departments. Double-click DepartmentName.
Expand the Tables/Queries list and select Table: Staff. Double-click LastName,
FirstName and then DateOfHire. Click Next. Click Next. Click DateOfHire and then
click the > button. Click Next. Expand the 1 box and select DateOfHire. Click Next.
Click Next. Type StaffByDepartment in the box and click Finish.

10. Add the Services table to the relationships window - ANSWER: On the
Relationship Tools Design tab, in the Relationships group, click the Show Table
button. Double-click Services. Click Close.

11. Using the current view, insert a new Short Text field named FirstName between
the StartDate and LastName fields. Save the table when you are finished. - ANSWER:
On the Table Tools Design tab, in the Tools group, click the Insert Rows button. Type
FirstName in the FieldName cell and press Tab. Expand the Data Type list and select
Short Text. Click the Save button on the Quick Access Toolbar.

12. Use Filter by Selection to filter the table to show only records where the value of
the IncreaseDate field is on or after 12/31/2019. - ANSWER: Click on the date
12/31/2019 in the IncreaseDate column. In the sort & filter group click on or after on
the selection drop down box.

13. Enter the following information in the form. Enter 10-9915 in the StaffID field.
Enter Finley in the LastName field. Enter Devon in the FirstName field. Enter 8/12/82
in the DOB field. When you are done entering data in the last field, start a new blank
record. - ANSWER: You clicked the control, changed the cell's value to "10-9915",

The benefits of buying summaries with Stuvia:

Guaranteed quality through customer reviews

Guaranteed quality through customer reviews

Stuvia customers have reviewed more than 700,000 summaries. This how you know that you are buying the best documents.

Quick and easy check-out

Quick and easy check-out

You can quickly pay through credit card or Stuvia-credit for the summaries. There is no membership needed.

Focus on what matters

Focus on what matters

Your fellow students write the study notes themselves, which is why the documents are always reliable and up-to-date. This ensures you quickly get to the core!

Frequently asked questions

What do I get when I buy this document?

You get a PDF, available immediately after your purchase. The purchased document is accessible anytime, anywhere and indefinitely through your profile.

Satisfaction guarantee: how does it work?

Our satisfaction guarantee ensures that you always find a study document that suits you well. You fill out a form, and our customer service team takes care of the rest.

Who am I buying these notes from?

Stuvia is a marketplace, so you are not buying this document from us, but from seller knoowy96. Stuvia facilitates payment to the seller.

Will I be stuck with a subscription?

No, you only buy these notes for $17.99. You're not tied to anything after your purchase.

Can Stuvia be trusted?

4.6 stars on Google & Trustpilot (+1000 reviews)

71184 documents were sold in the last 30 days

Founded in 2010, the go-to place to buy study notes for 14 years now

Start selling
$17.99
  • (0)
  Add to cart