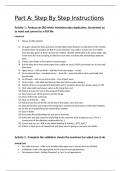
This is the Pearson BTEC Level 3 Information Technology, Unit 2, part A step by step instructions. Covering all the criteria in detail with references included and was awarded a Distinction. With an easy to follow format and structure, guaranteed to help you get the best grade possible! Led me to r...
Part A: Step By Step Instructions
Activity 1 : Produce an ERD which minimises data duplication. Screenshot on
to word and convert to a PDF file
Important
Always 4 table solution
1) On paper, group the data and draw out the tables (each ID gives an indication to the number
of tables there are going to be BUT in some instances you need to create your own tables
from the data given as there need to be 4 tables). Identify which table is the joiner table, add
in the extra ID’s that are going to linked to each other and draw the relationships between
each.
2) Create exam folder in form given on exam paper
3) Put the data given from exam paper into a table on excel, CHECK and make sure to save and
then close.
4) Open access – click on blank – add title from exam paper – create
5) Go to external data – new data source – from file – excel and click on the saved table that
has the data
6) Go through – click on no primary key – save import steps
7) Go to create – click table and then go back and click on query designs
8) Double click on one grouped ID data table and on property sheet, put unique values as YES
9) Click make table and always name as tbl_thing then run!
10) Repeat process for rest of the grouped ID data tables
11) Once done save all the queries and tbl_things
12) Close all the tabs at the top
13) Click on all the tbl_ - view
14) Add primary keys to the ID’s at the top of the tables, save and close
15) Click primary key and drag to the foreign keys needed and click enforce referential integrity
16) Do this to all establishing the relationships needed
17) Save in folder
18) Prt Screen the relationship part and put in word doc
19) Add a title and add a text box explaining to the examiner what is going on (e.g. This is a
screen print of the database relationships for…)
20) Covert and save as a PDF in the folder labelling it Activity1_3073_Asif_T
21) If there is time go on to PowerPoint and show what is going on and save into folder
Activity 2 : Complete the validation checks the examiner has asked you to do
IMPORTANT
For table structure - Make sure all tables data types are in correct form for all fields
Validations need to be appropriate to the scenario and requirements
For presence check - Setting ‘Required’ to ‘yes’ is not appropriate
The benefits of buying summaries with Stuvia:
Guaranteed quality through customer reviews
Stuvia customers have reviewed more than 700,000 summaries. This how you know that you are buying the best documents.
Quick and easy check-out
You can quickly pay through credit card for the summaries. There is no membership needed.
Focus on what matters
Your fellow students write the study notes themselves, which is why the documents are always reliable and up-to-date. This ensures you quickly get to the core!
Frequently asked questions
What do I get when I buy this document?
You get a PDF, available immediately after your purchase. The purchased document is accessible anytime, anywhere and indefinitely through your profile.
Satisfaction guarantee: how does it work?
Our satisfaction guarantee ensures that you always find a study document that suits you well. You fill out a form, and our customer service team takes care of the rest.
Who am I buying these notes from?
Stuvia is a marketplace, so you are not buying this document from us, but from seller AcademicElevateHub. Stuvia facilitates payment to the seller.
Will I be stuck with a subscription?
No, you only buy these notes for £2.99. You're not tied to anything after your purchase.