UNIT 2 Practical Scientific Procedures and Techniques:
Assignment 1 - Stevie-Jade Vickers
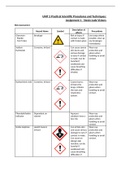
Risk Assessment
Description of
Hazard Name Symbol Precautions
effects
Glassware Breakage Risk of injury if Use tongs where
- Pipette contact is made possible, clear up
- Test Tubes with broken glass any breakages
immediately.
Sodium Corrosive, Irritant Can cause severe Wear eye
Hydroxide skin burns and protection and
serious damage gloves when
to eyes if contact handling to avoid
is made. Can be contact.
harmful if
swallowed and
cause breathing
difficulties if
inhaled.
Hydrochloric Acid Corrosive, Irritant Causes burns, Wear eye
irritates the protection and
lungs, irritates gloves when
the eyes and handling to avoid
respiratory contact.
system.
Phenolphthalein Dependent on Aqueous Wear eye
Indicator solvent solutions have a protection and
low risk. gloves when
handling to avoid
contact.
Nickle Sulphate Health hazard, Can irritate skin Wear eye
Irritant and cause serious protection and
damage to eyes if gloves when
contact is made. handling to avoid
Can cause an contact.
allergic skin
reaction, can be
harmful if
swallowed and
cause breathing
difficulties if
, inhaled.
Copper Sulphate Corrosive, Irritant Can irritate skin Wear eye
and cause serious protection and
damage to eyes if gloves when
contact is made handling to avoid
contact.
Sodium Irritant Can cause eye Wear eye
Carbonate irritation if protection when
contact is made. handling.
Calibrating the top pan balance.
Original Tolerance Limit Attempt 1 (g) Attempt 2 (g) Attempt 3 (g)
calibration mass (g)
(g)
2 0.1 2.02 2.01 2.00
10 0.1 9.99 10.00 10.00
To calibrate the balance, I plugged in the balance and turned it on. I left the balance to warm up to
the room temperature, as temperature affects calibration. I then proceeded to tare the balance, so
the reading showed 0.00g. I chose one of the manufacturer’s calibration weights which had a mass
of 2.00g. I placed the weights in the centre of the balance and recorded the mass, which on my first
attempt was 2.02g. As this was outside the tolerance limit, and I was to carry out three attempts to
ensure accuracy, I adjusted the surface my balance was placed on and measured the weight again.
This time, it measured 2.01g. Although this was within the tolerance limit of 0.1g, I still had one
more attempt and so I adjusted the surface once more and finally got a reading of 2.00g. I chose
another one of the manufacturer’s calibration weights which had a mass of 10.00g and repeated the
above process. I tared the balance and placed the weight in the centre of the balance. On my first
attempt, I got a reading of 9.99g, however, on both my second and third attempt, I got a reading of
10.00g.
I calibrated the balance to ensure that its readings were as accurate as possible, so that when
experiments are carried out using the balance, my results were as accurate as they could be.
Calibrating a graduated pipette.
Volume of water measured 10cm3
Mass of water measured 9.94g
Today’s room temperature 17 °C
The density of water at today’s temperature 0.99880g/cm3
Show calculations of volume below Mass of empty beaker + water – mass of empty
, beaker
The calculated volume of water 10cm3
The difference in volume measured and
0.04cm3
volume calculated
To calibrate the graduated pipette, I measured the mass of an empty beaker on a calibrated top pan
balance. I recorded the mass of the empty beaker, which was 10.27g and proceeded to measure
10cm3 of distilled water in a rolling pipette. I ensured that the tip of the pipette was fully submerged
in the water so that no air bubbles aspirated. Once I had accurately measured 10cm3 of distilled
water, I transferred it to into the empty beaker which I measured the mass of previously. Using the
top pan balance once again, I measured the mass of the beaker with the distilled water inside. To
calculate the mass of water, I subtracted the mass of the empty beaker (10.27g) from the mass of
the beaker and water together (20.21g) which was 9.94g. The room temperature was measured at
17 °C, so the density of the water was 0.99g/cm3. I used this to calculate the correct volume of
water. I calculated this by dividing the mass of water measured by the density of water, which was
9.96cm3.
The factors which may have caused two different volumes could have been an unlevel surface,
fluctuation of temperature, a balance not correctly calibrated or not transferring all water from the
pipette to the beaker to be measured. Our error was 0.04cm3, and we had a percentage error of
0.4% (0.04/10 x 100). To increase the accuracy of the readings for calibration, it would be
appropriate to leave the balance for a longer period of time to adjust to the room temperature.
When heat is added, solids, liquids and gases expand. This is because the atoms begin to vibrate
faster, causing the space between atoms to increase.
Calibrating pH probes.
I used the Hanna HI207 pH meter. The pH probe is stored in pH storage solution which ensures that
the membrane on the probe does not dry out, as this affects the readings. I connected the pH probe
to the pH meter and turned the pH meter on. I allowed five minutes for the meter to warm up to the
room temperature, which was 17 °C, before beginning to use the manufacturer’s pH calibration
solutions. I first held the on/off button until the screen read CAL. After, the screen displayed pH 7.01
“use”, so I took the pH probe out of the storage solution washed it in distilled water and placed the
probe in the pH 7 buffer solution. I waited until the screen changed to pH 4.01 “use”, and the quickly
washed the pH probe in distilled water in a beaker, and then placed the probe in the pH 4 buffer
solution. I had 10 seconds to do this, so I had to be quick and careful. I waited until the screen
changed from “REC” to “OK2” to check if the pH meter was calibrated. I managed to calibrate it on
my first attempt. It is important to calibrate the pH probe as various factors can affect the pH. For
example, if the temperature fluctuates whilst the investigation is taking place, the pH readings will
be corrupted as temperature affects pH. The pH meter should therefore be calibrated at the
temperature that the investigation is going to be carried out in to ensure maximum accuracy.


