Unit 14
Assignment B
Grave Discovery
In this assignment, I will be detailing how we assessed our burial scene, evaluate the
techniques used and other scientific methods that may have been more useful or may’ve
been more effective.
How we analysed the scene
We first examined the area visually, trying to find any disturbed ground or suspicious areas
that may have been excessively covered with branches or bricks. As it had rained in the
previous days, we were looking for dry and damp areas as we were told that the site had
been discovered the previous day. At archaeological sites, disturbed soil can be a way to
find the grave, as the soil layers may be mixed or the soil that should be further down in the
earth may be at the top. This archaeological method involves systematically searching the
site for soil discoloration, unusually shallow, mounded soil, uneven terrain or possible
surface artefacts (1). Due to the nutrients coming from a decomposing body, more
vegetation may also be present. Eventually we discovered patches of earth that appeared to
have been excavated and replaced with new earth due to the unevenness compared to the
rest of the site, and realised that this might be where the graves are. At this point, as team
leader, I filled out my risk assessment in the crime scene documentation, including hazards
such as twigs on the ground that could pose a tripping hazard and vermin that could be
present in the ground and cause bites or reactions. I also noted where the crime scene was
located. This is important to determine the approximate location
of the grave as it can help retrace the steps of the perpetrator
and determine the location of the original crime.
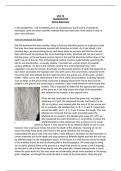
When we had concluded we found the grave site, we began
sketching out a grid. We measured the site, and found it to be
100 cm by 66cm, and created grids the size of 20 cm across and
20 cm vertically. We labelled them A, B, C, D and E horizontally
across the width, and 1, 2, 3, 4 and 5 across the length. This was
effective as it ensured that we could accurately place the
artefacts on our sketch in the labelled grid areas (20 x 20), we
also measured the exact dimensions in centimetres of where the
artefacts/remains were positioned. This is shown on my rough
Figure 1 - sketch in Figure 1. This would not be an effective sketch to use in court
however, this is because it does not show the depth of the artefacts, meaning we do not
know how deep these items were found in the grave, therefore not knowing how
shallow/deep the grave was, this may make it more difficult to ascertain the decomposition of
certain materials due to the depth and bugs present at different depths and how the soil may
be different based on the stratigraphic layers. In the future, it is vital that we record the depth
of the artefacts found, as well as showing that in the photography. We used pegs to string
out our grids (placing them in the ground at a height that would not cause a risk of tripping),
we decided to not put the string directly over the grave site, instead making marks in knots
where the grids would be, this may mean we accidentally placed some artefacts in the wrong
grids. However, we thought this would be best in order to dig more easily. Using the grid
, method is also effective in ensuring that a scene has the ability to be easily replicated, and
documentation can be consistently recorded. It also gave us the ability to more easily plot
the artefacts found in relation to each other, showing more effectively visual data on how
close/far apart the artefacts were. This may help show also whether a scene was more
rushed (as to whether the artefacts were placed more carefully apart or placed
sporadically/close together in a non-specific way). We could have done another sketch
displaying the depth separately, this would have been another effective way in displaying
their depths in relation to the grave size.
I decided to make the layers dug with a depth of 20cm each time, filtering through each layer
of sediment with a sieve. This ensured that we knew the rough depth of each artefact (it was
not labelled on the sketch), and we could go through each layer with the sieve ensuring no
little bone fragments or artefacts were found such as teeth, it would be bad to miss evidence
due to it then not being able to be analysed, and potentially find more evidence such as DNA
or fingerprints. However, as we were digging we may have dug at different depths each time
after we found the artefacts, in order to place them on a platform for extraction, this means
for items such as the cardigan and glove, we don’t know what exact depth they were found
at as they were uncovered trying to extract the skull. Stratigraphy, i.e. looking at the layers of
soil, can be used to determine the chronological events of a site. By digging in different
layers of soil, we were able to uncover the different layers in the ground. The use of trowels
within our equipment helped aide this due to the fact they are smaller, and prove more
effective when it comes to not missing any artefacts, digging at the same depth in layers,
and being more precise overall for our gridding technique, compared to using a larger spade,
which may mean you are more susceptible to hitting/damaging any artefacts as you uncover
them.
Scene Documentation (Photography)
Figure 2 - Overhead view
Within our scene, we documented the position of the
remains and artefacts using pictures and sketches of the
scene. The pictures we took were off bird’s eye/overhead
views and mid-range. The overview shots were effective in
being able to show the location of the remains and the
context of the grave they were found in, as well as for
having the ability to sketch the scene and the arrangement
of the bones. The mid-range shots helped to provide depth,
this could help provide a supplement of how deep down the
artefacts have been buried visually. These photos were
taken on my phone, meaning their quality was decent and they
wouldn’t be blurry, and were documented within the rest of our
crime scene documentation.
Something that could have improved our photographs was Figure 3 - Mid-range
using scale rulers, which would have made it easier to see
the size of the artefacts in relation to the grave size better, Figure 4 - Site
as this is difficult to see in a photograph. We also did not
make sketches of the individual artefacts, so their overall